 Ask The Home Geek
LED strip lights aren't permanent fixtures, so there's no reason to leave them behind when you redecorate or move house. With a bit of care, you can take them down without damaging your walls and put them up again somewhere new.
Here are seven things to know about removing, re-sticking, packing, and reusing LED strip lights.
1. Yes, You Can Reuse LED Strip Lights
LED strips are easy to reuse. The LEDs themselves typically last for many thousands of hours, so most strips have plenty of life left when you take them down. The only part that usually doesn't survive removal is the adhesive tape on the back, and that's easy to replace.
The key is to remove them gently so you don't damage the wall, crack the strip, or tear the copper pads.
2. How to Remove LED Strip Lights Without Ripping Paint
LED strips use strong adhesive tape, and pulling them off quickly can lift paint or the paper face of drywall. Here's the gentle way to do it:
- Unplug the strip. Disconnect the power supply and controller before you start. That protects the electronics and makes the strip easier to handle.
- Warm the adhesive. Hold a hairdryer on low to medium heat about 10–15 cm (4–6 inches) from the strip, and move it slowly along a short section for 30–60 seconds. The adhesive should feel warm and soft, not hot.
- Lift one end. Gently work a fingernail or a plastic card, like an old gift card, under the end. Skip metal knives and coins, which can gouge the paint.
- Peel low and slow. Fold the strip back on itself and pull it along the wall, keeping it close to the surface, rather than straight out. Warm the next section as you go.
- Use floss for stubborn spots. Slide dental floss behind the strip and use a sawing motion to cut through tough adhesive.
- Don't rush. If the adhesive cools and stiffens, warm it again.
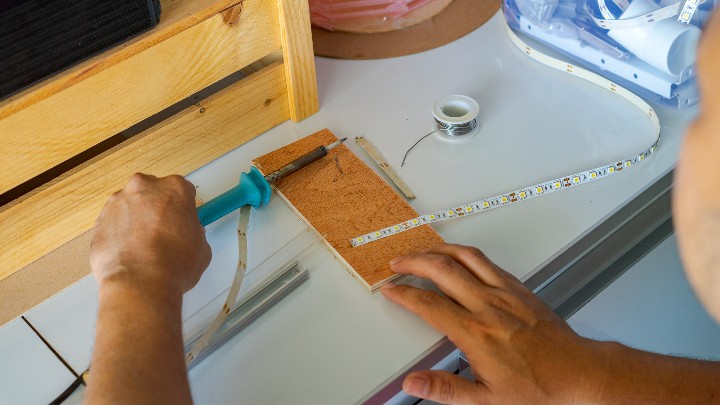
Avoid sharp bends while peeling. Creasing the strip can crack the circuit or the solder joints and leave sections that no longer light up. If you shorten a strip, cut only at the marked cut lines, with the power unplugged.
Cleaning up residue: Roll leftover adhesive off with your fingers, or wipe it with warm, soapy water. If you need something stronger, test rubbing alcohol or a citrus-based adhesive remover on a hidden spot first, since some can dull or soften paint.
3. How to Re-Stick LED Strip Lights
Once a strip has been peeled off, its original adhesive usually won't hold properly again. First, peel or roll off the old tape and any leftover residue from the back of the strip, then choose a new way to mount it:
- New double-sided tape: Use a good-quality foam mounting tape, ideally one made for LED strips or electronics, in the same width as your strip (often 8–10 mm). Many brands sell pre-cut LED strip tape.
- Mounting clips: Small screw-in or adhesive clips hold the strip without relying on tape along its whole length. They're useful on textured walls, or anywhere the strip keeps peeling.
- Aluminum channels: The channel attaches to the wall, and the strip sits inside it. You get a neat, diffused line of light, better cooling, and easier removal next time.
- Removable adhesive strips and hooks (Command-style): These are useful for renters. Use them to hold clips or short sections without damaging the paint.
- Clear cable ties: These are useful for attaching strips to shelving, railings, bed frames, and furniture legs.
Skip hot glue on walls. It can overheat and damage the strip, and it's very hard to remove cleanly. Mounting putty only holds short, light sections.
Before sticking the strip down, clean the surface with rubbing alcohol or a damp cloth and let it dry fully. Then press the strip firmly along its whole length.
4. Can You Make the Old Adhesive Sticky Again?
Not really. Once the original tape has picked up dust and lost its tack, it won't hold reliably again. Warming it with a hairdryer can help for a short time, and then the strip usually starts to sag.
The better fix is to remove the old tape completely and apply fresh mounting tape, or switch to clips or a channel. New tape stuck on top of the old layer won't bond well, and the strip will still fall off.
5. The Best LED Strip Lights for Reusing
If you're buying new strips, or want something easier to move and reuse, these are popular options:
Top pick
A 100-foot RGB strip and the current top result for LED strip lights. It uses an app and an infrared remote, with music sync from a built-in microphone, color modes, and a timer. The listing describes it as indoor and does not include Alexa or Google voice control. Clips or a channel hold a strip this long more neatly than the adhesive alone.
Check price on AmazonRunner-up
A 110-foot RGB strip sold as one roll. It connects over Bluetooth, with app control, a 44-key remote, music sync, a timer, and a memory function. The strip can be cut, and it has adhesive backing. It does not need Alexa or Google voice control.
Check price on AmazonAlso great
A 16.4-foot RGBIC strip, which can show several colors at once along its length. It is a Bluetooth strip controlled with the Govee app. It is a strong choice for a bedroom, desk, or gaming setup where you want those effects in a smaller space.
Check price on Amazon6. How to Pack LED Strip Lights for Moving
- Keep everything together. Put each strip with its power supply, controller, and remote in a labeled bag, so nothing goes missing.
- Coil, don't fold. Wind the strip loosely around its original reel, or a piece of cardboard or a paper-towel tube, with the LEDs facing outward. Never fold it into sharp creases.
- Protect any exposed adhesive with wax paper or baking paper, so the strip doesn't stick to itself or to the packing materials.
- Wrap and pad. Wrap each coil in bubble wrap or a soft cloth.
- Use a sturdy box that's not too big, so things don't slide around. Fill gaps with padding.
- Label the box with the room and the voltage printed on the power supply, such as "Bedroom LED strip + 12V supply." A 12V strip and a 24V supply are not interchangeable.
- Keep it dry, and out of extreme heat or cold, during the move.
If you cut a strip into shorter pieces, cut only at the marked cut lines and label each piece with its length.
7. Do LED Strip Lights Burn Out?
LEDs rarely fail all at once the way old bulbs did. They slowly lose brightness over thousands of hours. Good-quality strips are often rated to keep about 70% of their original brightness for tens of thousands of hours. They also don't use much electricity compared with older bulbs.
Strips can still fail early, usually because of:
- Heat: Strips on a surface that traps heat, or strips that are covered, dim and fail faster. An aluminum channel helps.
- Running at full brightness all the time: Higher current means faster dimming.
- Physical damage: Sharp folds, cracks, and damaged solder joints or connectors can make whole sections go dark. Gentle removal matters.
- A failing power supply or controller: These often quit before the LEDs. Replacing the power supply can bring a dark strip back to life. Match the voltage on the label.
- Power surges: A surge protector adds a layer of protection.
Treat the strip gently when you remove and pack it, keep it cool once it's installed, and the same strips can move with you more than once.